Showing posts with label Makeup. Show all posts

Saturday, November 30, 2013

A Look at the Studio Gear Cosmetics Holiday Smoky Eye Palette


**Get it here!  Use code SGHOLIDAY for 10% off!**

I was lucky enough to be chosen through BrandBacker to receive the new Studio Gear Cosmetics Holiday Smoky Eye Palette, just in time for the holiday season!  This palette is full of gorgeous shimmery shades to add a little sparkle to any holiday look.  

The first thing I noticed is that the packaging is lovely.  The outer sleeve is elegant and reminiscent of winter lights, and the actual product packaging is slim, sleek, and durable.  Beginners should also take note--this palette includes an instruction panel on the inside that teaches you how to achieve a perfect smoky eye for yourself!

The palette includes four eyeshadow shades and one blush shade.  The blush is a pretty and flattering peachy pink that will bring a natural flush of color to any face.  The four eyeshadow shades can be worn separately or combined together to create a stunning smoky look.  The palette’s frost shade is a sheer shimmery white (perfect for a snowy holiday look) that can be used all over the lid or as a highlighter.  The silver shade in the palette is the most pigmented, and probably my favorite of the bunch.  It is a sultry, shimmery shade that glides on effortlessly and will compliment every eye color.  The palette also includes a sheer gold shimmer that is beautiful as an accent color, and a smoky black with a hint of glitter for adding drama to the look.

Swatches of all palette colors without primer.  The Frost and Gold shades are pretty similar to my skin tone so they don't show up quite as well!

This is a quality palette that is versatile, easy to use, and perfect for the holidays!  With a major sale on the palette going on here (and with an additional 10% off with the code SGHOLIDAY), I see no reason to pick one up now as a gift for yourself or a friend!

Have you used this or other Studio Gear cosmetics before?  What do you think?  Let me know in the comments!


Note:  This post was sponsored by BrandBacker. The only compensation received was a free sample provided by Studio Gear Cosmetics.  


Sunday, October 20, 2013

Review: BA STAR Holiday Red Lip Pencil


 OVERALL RATING:  9.5/10

PROS:  Incredibly easy to apply, beautiful bright red color, silky matte finish, EXTREMELY long-wearing, feels like nothing's there!

CONS:  Color will transfer slightly to other objects (e.g. cups, skin, clothing), but this will not reduce the color intensity on the lips themselves

WHERE TO BUY: BA STAR  (use code BBLIPS for a special 50% discount!)


Ladies and gentlemen, say hello to my new go-to red for the stage.

As an actor, there is almost nothing that can be more frustrating than stage makeup.  If you don't get it exactly right, it won't look good under the lights, will come off when you sweat, will break out your skin, etc.  Lip color is especially hard.  With so much talking onstage and water breaks backstage, I have never found a lip color that lasts.  I've been through drugstore brands, high end brands, and brands made specifically for the stage (I'm looking at you, Ben Nye), and no lip color has worked... Until now.

BA STAR is a brand that was created specifically for dancers, cheerleaders, and performers.  Their colors are bright and bold and sure to last, and this Holiday Red lip pencil is no exception!  It is a beautiful true red with slightly blue undertones, making it perfect for many skin tones.  The best thing about this lip pencil, though, is that it isn't just for the stage... It looks beautiful on, and you can guarantee that I'll be wearing it out!

Here's what makes this lip product so unique.  The application is precise and easy due to its pencil shape, and you can line and fill in your lips with the same product.  The real treat, however, comes in this lip pencil's sheer staying power.  While wearing this product, I ate, drank, took a nap, talked on the phone, and more.  The color didn't budge during any of these activities.  It was still just as bright and vibrant after having dinner and a glass of water as it was when I put it on.   The lip color is also tasteless, unlike some of those other icky lipsticks that taste waxy or fake.  I k
now this because in an attempt to prove that NO lip color could possibly last this long, I licked my lips furiously.  The results:  no taste, no reduction in color.  This stuff has some serious staying power.  Plus, it has a nice matte finish that you can shine up easily with a little lip gloss if you'd like, or leave as is.  You can't even feel it on your lips and will forget it's there... But other people certainly won't!

The BA STAR pencil is incredible, and I highly recommend it if you are an actor, dancer, cheerleader, other type of performer, or just someone who is sick of lip color that doesn't last.   You can usually buy this pencil for $8.75 at bastar.com, but BA STAR is giving out a special discount for beauty bloggers and their readers for 50% off!  Use the code BBLIPS to get your lip pencil today!  This one's a MUST HAVE!

Have any of you ever used BA STAR cosmetics before?  Do you plan to?  Let me know in the comments!

Note:  This post was powered by BrandBacker.  For more information, go to www.brandbacker.com

Thursday, July 18, 2013

Review/GIVEAWAY: New POND's BB+ Cream


OVERALL RATING:  9.5/10

PROS:  Great coverage, blends in seamlessly with skin, moisturizing, evens skin tone, contains SPF 15, reduces dark spots over time, non-greasy, hypoallergenic, non-comedogenic, combines several products into one, smooth matte finish, great price

CONS:  Slightly strong scent which fades throughout the day


**Enter the giveaway below for a chance to win your own full-size POND's BB+ Cream in Medium!**

**Please take a second to vote for my video testimonial of this product here to help me win a chance to appear in an ad campaign or on Entertainment Tonight!**

Before I got my hands on the new Pond's BB+ cream, I had a very distinct image of Pond's as a brand.  For me, Pond's was synonymous with the creams and skincare products used by the adult women in my life; my grandmother, my aunts, and my mom.  Pond's was an "old lady" brand to me, so when I heard about their new BB+ Cream, I sort of shrugged it off... That is, until I got my hands on some.

I got this product for free to test out from Influenster and Pond's.  Upon opening the package, I was surprised by how cute and fun the product packaging was.  It looked sweet but still simple, and it definitely caught my attention.  I headed to my makeup station to try it out, and IMMEDIATELY fell in love.  In fact, I am so sold on this BB+ Cream that I am planning on totally ditching my $45 Laura Mercier tinted moisturizer in favor of this magic little $10 bottle!

As you can see, the BB+ Cream has some incredible color correcting power!  My skin has a tendency to get a little pink sometimes, and this evened it right out!  It also makes my pores appear smaller, and gives my skin a very subtle radiance while still looking totally natural.  One thing that I really love about it is that it doesn't conceal my freckles--it just makes them
blend in a little better!  The product smooths on perfectly and then seems to just disappear into your skin.  I've also noticed that my skin feels softer at the end of the day after using this BB+ Cream!  Another thing that I love about it is that the BB+ Cream will work with both warm and cool undertones because the pigment actually adjusts to match your skin.  It's so hard for me to find reasonably priced products for very fair skin with cool undertones, so this is a huge bonus!  I also love that this BB+ Cream can double as my foundation and moisturizer in one, so I don't have to spend as much time putting things all over my face!

Here's what POND's wants you to know about their brand new product:


  • Visibly reduces the appearance of dark spots to even skin tone in two weeks
  • Superior* coverage of imperfections
  • Superior* visible dark spot reduction
  • Superior* non-greasy feel with a matte finish
  • Tone Perfecting Complex formulated with:
    • Vitamin E Acetate – an antioxidant known to protect and repair skin
    • Glycerin – helps increase hydration
  • Brightens and hydrates with lightweight moisture
  • SPF 15 protects against harmful UVA/UVB rays
  • Hypoallergenic and non-comedogenic
  • Reduces the number of beauty and skin care products required during a daily beauty regimen
 *POND’s® Light Shade BB+ vs. the top-selling BB Cream.

So far for me, all of this has been absolutely true!  I couldn't be more impressed with this product... And I'd like to give you a chance to try it for yourself!  Enter to win below by following the PMR Twitter and Facebook page, or earn more entries by liking my POND's BB+ video contest entry here (I'm Thespianna)!  You can enter to win starting on July 19th at midnight, and can enter every day until August 16th!


a Rafflecopter giveaway


Now I think know why the older (and wiser) women in my life use POND's products and are so loyal to them.  POND's has created a fantastic BB Cream for an outstanding price, and they have certainly earned my loyalty!

POND's BB+ Cream will hit major retailers and drugstores in mid-July, and will retail for about $9.99.  Be sure you pick some up and tell me about your experience in the comments!


Monday, July 15, 2013

Video: NEW POND's BB+ Cream!


Here's a sneak peek at an awesome product I just got from Influenster... the brand new POND's BB+ Cream!  I'll be posting a full written review soon, but in the meantime be sure to watch this and get excited for this product to hit store shelves!

Also, if you like this video, please take a second to vote for me on the POND's Facebook page at http://facebook.com/PONDS!


Thursday, January 3, 2013

My Holiday Haul

Beautysets - Holiday Haul

This year Santa sure delivered in a big way! I got many of the beauty items on my wish list for Christmas and have been absolutely loving them.  I wanted to give you all a preview of some of the new products that you can expect to see reviews of soon.  With the holiday madness, I've had no time to post, but I'll be getting back into the swing of things soon with some reviews of these awesome products!

What did you get as gifts this holiday season?  Any favorites?  Let me know in the comments!

Monday, December 24, 2012

Announcing the 2013 Color of the Year: Emerald Green!

Beautysets - Emerald Green - 2013 Color of the Year

As a green-eyed lady, I'm loving this choice!  What do you think of the announcement of Emerald Green as the color of the year?  Have any opinions on the products above?  Let me know in the comments!

Tuesday, December 18, 2012

Christmas Wishes


Beauty Wishlist 2012


We all have them:  those beauty items that you covet all year long, but just can't bring yourself to buy because of how dang expensive they are.  These are the items that make up my holiday wish list.  Here's a little insight into what I'm wishing for this year!

  1. Tarte's Lights, Camera, Lashes! 4-in-1 Mascara, $19 I'm usually not a big spender when it comes to mascaras, sticking to Maybelline to make my lashes pop.  Maybe that's why I've been so dissatisfied.  I've heard rave reviews of this mascara, and hope I'll be able to try it out for myself!
  2. NARS Orgasm Blush, $28 The mother of all blushes, according to the beauty blogosphere.  I own a supposed dupe for it (Elf's Candid Coral, check out my post here), but I've heard that nothing beats the real thing.  With a hefty price tag, it's not something I would normally buy for myself... but hopefully Santa will deliver!
  3. Julep Nail Polish, $14  I don't even care what shade it is. This luxury nail color brand is all over Pinterest and even made the list of Oprah's favorite things 2012.  I want it all over my nails.
  4. MAC 286 Brush, $31  I really need a good blending brush.  Mine just ain't cuttin' it.  I've heard that MAC brushes are wonderful, and I'd love something that would last me a long time!
  5. Laura Mercier Tinted Moisturizer SPF 20, $43  The most expensive on the list.  I'm not a big foundation wearer--I've always had fairly clear skin, so I just like a bit of sheer coverage for color control.  Tinted Moisturizer is my go-to, and I've heard this is just about as good as it gets.
  6. Urban Decay 24/7 Waterproof Liquid Eyeliner, $19  This is one of my tried-and-true products.  It's the only liquid eyeliner that has ever had a brush I've been able to work with, it stays all day, and WOW is it ever pigmented!  I'm running out of my supply and need to get my hands on more... And I'd love to try out a few other shades from their rainbow supply of colors!
  7. Revlon Just Bitten Kissable Balm Stain, $13  I really do love this stuff.  It's super moisturizing, and lasts a really long time.  I have it in "Honey" and "Romantic."  I use "Honey" almost every day, but would love to expand my collection for more options!

So that's my Christmas Beauty List for this year... What's yours?  Any comments on the products I'm just dying to get ahold of?  Let me know in the comments!


Monday, December 10, 2012

Newest Beauty Buy: elf Studio Blush in Candid Coral

While shopping at Target the other day for something completely unrelated, I once again found myself in the cosmetics section of the store.  I was thrilled to find that they had an elf display--they seem to be hard to find where I'm from!

I had been reading a lot about elf's Studio Blushes, particularly a shade called "Candid Coral."  According to the blogosphere, Candid Coral is a close dupe for the ever-coveted NARS Orgasm shade.  Well, it was only $3 compared to the $26 I would have to shell out for an Orgasm compact, so I snatched it up!

I've only used it a few times, but I have to say that I'm super impressed!  The product is silky soft, and is a perfectly flattering shade for my skin tone.  It gives me a subtle flush that looks natural, but with the slightest bit of gold shimmer.  I don't own NARS Orgasm blush, but I imagine that this comes pretty close!

Also, the packaging for this product is unreal for only $3.  It's a hard, sleek black plastic that is sturdy and reliable.

For such an unbelievably low price, this is my new go-to blush!  I plan on picking up a few more shades to test out as well, and may deliver a full review with swatches when I have some more!


Have you used elf Studio Blush?  What do you think?  Which shade is your favorite?  Let me know in the comments!

Friday, November 30, 2012

Review/Swatches: COVERGIRL Blast Flipstick


OVERALL RATING: 10/10

PROS:  Long wearing, two in one, expertly coordinated shades, creamy/soft texture, blendable formula, large shade variety

CONS:  None!

Swatches at bottom of post

I'm going to be honest here:  I haven't been a fan of Covergirl cosmetics for a long time.  In my opinion, they're usually cheaply made and low-pigmented.  They just don't do it for me.  This product completely changed my opinion of the brand.

When BzzAgent offered me the opportunity to test out Covergirl's new Blast Flipstick for free, there's no way I could say no.  Free cosmetics?  Of course I'm going to opt in!  And boy, am I glad I did.  I'm so pleasantly surprised by this product that I just had to share!

Saturday, October 6, 2012

Review: LypSyl Intense Protection LypMoisturizer™

OVERALL RATING:  10/10


PROS:  All-natural ingredients, long-lasting, incredibly moisturizing, unique shape, great packaging, minty flavor, not tested on animals

CONS: None!

This has to be my favorite product that I received in my Naturals Voxbox from Influenster.  I'm a lip product junkie, so I was really excited to get a product that could help keep my lips soft and ready for cosmetics!  Before I got this product, I had been using Burt's Bees lip balm, which is good, but nothing compared to LypSyl!  This is definitely going to be my new go-to lip balm brand.

Tuesday, February 7, 2012

Video: Introduction to the Ben Nye Theatrical Creme Kit


Hey, everyone!  Today I decided to do my first post related to theatrical makeup.  As an actor, I know how confusing a new stage makeup kit can be, so I thought I'd try to explain the parts of a basic, well-known theatrical makeup kit for those who don't know too much about stage makeup!

Let me know what you think of the video and what your experiences with Ben Nye have been like in the comments!

Monday, February 6, 2012

Review: Maybelline XXL Extensions® Washable Mascara

OVERALL RATING:  8/10

PROS:  Drastically lengthens lashes, brushes are easy to use, comes with both a primer and mascara

CONS:  Actual mascara may make lashes a little spidery, clumps easily if not applied carefully


I ran out of my go-to Covergirl Lashblast Fusion mascara a little while ago, and while I believe that the Lashblast mascara definitely does its job, I wanted to try something else out for a change and to see if there was anything better out there that I was missing.

Friday, February 3, 2012

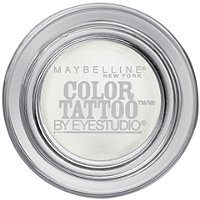
Review: Maybelline Eye Studio® Color Tattoo 24HR Cream Gel Shadow


OVERALL RATING:
6/10

PROS:  Easy to apply, nice color selection, stays on all day, very pigmented color

CONS:  Feels a bit gritty after a while, difficult to remove, hard to get it to look exactly right


As you can probably tell by some of my previous posts, I'm a little bit of a Maybelline addict.  I've been really happy with the new products that they've been coming out with lately, so it was only natural that I would try to go out and find their newest cosmetic item.  The Eye Studio® Color Tattoo 24HR Cream Gel Shadow (which is quite the mouth full) was out of stock for a while at my local drugstores, but on a recent shopping trip--which, if you're like me, is originally intended for food and other necessities, but ends up turning into a makeup haul--the display was fully stocked.  I couldn't resist, and grabbed some of the Color Tattoo shadow in Pomegranate Punk.  I went home and put it on right away.  Sadly, I have to say that this product didn't quite live up to the recent Maybelline hype.


Sunday, January 29, 2012

Review: Revlon Colorburst Lip Butter


OVERALL RATING:
8/10

PROS: Great color selection, smooth application, feels good on lips, nourishes lips, very long-lasting

CONS: Packaging feels very cheap, many layers are required for full-impact color


After recently being required to purchase a rather expensive stage makeup kit for an upcoming show, I was sure that I would have all of the makeup I would need for my future performances in Real Women Have Curves.  However, as much as I love Ben Nye stage makeup, I quickly discovered a major flaw in this particular kit--the only included lip color was a muted neutral; which, for a play set in the 80's, was just simply not going to do. With our second dress rehearsal approaching quickly, I found myself in dire need of a great, bright red lip color that would last easily through an entire performance.

Naturally, I trucked over to the campus area CVS and started browsing.  The display for the Revlon Lip Butters caught my eye immediately.  It was bright and inviting, with plenty of pretty little tubes in a wide array of colors.  Recently in the beauty blogging world, the Revlon Lip Butters have been generating a lot of buzz, so I figured that I'd pick up the brightest red I could find in the collection and pray that it would live up to the hype.

Not only will the Revlon Lip Butter in Candy Apple work beautifully for stage makeup, but I have a feeling I'll be wearing it offstage as well.

I have to start by saying that I'm not a huge fan of the packaging of this product.  The design is nice;  the cap of the tube has a pretty quilted pattern, and the tube itself looks very sleek and elegant.  However, the whole thing feels very cheap and plastic-y.  I'm a little worried about the durability of the packaging, since it feels that the whole thing could very easily be crushed or cracked.

Revlon definitely makes up for the lack of packaging quality when it comes to the quality of the product itself.  Applying the Lip Butter feels just like putting on my favorite lip balm, and it definitely has the same smooth and soft feel on my lips.

The color itself is beautiful on, but I did have to apply several layers to get a high-impact color payoff.  In my opinion, this isn't that much of a problem, because it means that the color is buildable and you can adjust the saturation/intensity to fit your needs.  For example, when I'm wearing this color on stage, I'll be able to layer it enough that it reads as a nice, bright red from a distance, and when I wear it for every-day purposes, I can create a softer, prettier look by applying less.

I wore the Lip Butter today, and it stayed put and kept its color intensity for a full six hours with no problems.  When I ate, however, the color definitely started to come off.  This just means that you'll have to reapply the color after eating or drinking, but this is the same as most other lip colors, so I'm not counting it as a negative aspect of the product.

After the Lip Butter wore off (and a little bit was taken off with makeup remover), my lips definitely felt softer than they did before I had applied the product.  The Lip Butter certainly nourishes the lips like it claims to!

As someone who doesn't enjoy lipstick at all, I find this to be a great alternative.  It feels much more like a lip balm than a lipstick, while still providing beautiful color.  I'm glad I picked this up... both my character and I will be using it frequently!

Have you tried any of the Revlon Lip Butters?  Which shades are your favorite?  Let me know in the comments!

Monday, January 23, 2012

Review: Maybelline Dream Bouncy Blush

OVERALL RATING:  9/10

PROS:  Fun texture, melts into skin, easy to apply, beautiful color selection, stays on all day, sheer color, buildable, dermatologist and allergy tested

CONS:  May be difficult to get used to at first for those used to powder blush, a lot is needed for a more dramatic look


I have to say, Maybelline is on a roll lately with their new products!  They're introducing a lot of really great, quality stuff, and the Dream Bouncy Blush is another example of this.

I've never really been a big blush wearer myself, although I knew that it would probably be a good idea to use a bit.  If I felt like adding a little natural flush or playing up my cheekbones, I'd just swipe on a tiny bit of powder blush and go.  When I first heard about the Dream Bouncy Blush, though, it definitely caught my attention.  There's something about the word "bouncy" that suggests a fun, youthful product, and it made me curious (good job, Maybelline marketing department).  How could a blush, or any makeup product for that matter, be "bouncy?"  Curiosity got the best of me, and on a shopping trip to my local CVS, I decided to pick some up.  I'm glad I did... I'm loving it!

My Dream Bouncy Blush in #40, Pink Plum
I chose to get the blush in #40 Pink Plum, shown on the right.  With my extremely fair, cool skin tone, I need to be careful to get blushes that are more pink hued, instead of peach.  Pink Plum has proven to be an excellent match for my skin.  Fair skinned ladies, don't be afraid of how bright it looks in the pan!  It's a nice, light pink that goes on very sheer, so it gives me a pretty, natural flush that makes me look more energized and alive.

The first thing that I noticed about this blush is the texture.  You apply this blush with your fingertips, so when I went to pick some up for the first time, it caught me a little off guard.  I actually started giggling... They weren't kidding when they decided to call this blush "bouncy!"  It has sort of a jelly, sponge-like texture, but picks up just like a cream.  I spent a few minutes swirling my finger around it, just because it's so fun to feel!

To use this blush, you pick up some of it with your finger (by rubbing or swirling your fingertip on the blush), then use your fingertip to pat and blend the color onto your cheeks.  I find that if I apply it to the apples of my cheeks first and blend outwards and upwards towards my temples, it gives the best effect.  Because you use your fingertips to apply the blush, you are entirely in control of where the blush goes.  It may take a little while to get used to for people who are used to applying powder blush with a brush, but because of the color payoff and the more natural, less "makeup-y" look, I think it's definitely worth it.

The blush melts easily into your skin like a cream, providing a nice wash of color that looks natural instead of just sitting on top of your skin.  The way it applies reminds me a lot of the Tarte Cheek Stains, but this is obviously a much more frugal option.  I think it looks just as good as my Tarte Cheek Stain in Flawless!  It also appears to last just as long as a stain.  I wore it all day to meetings, a physically demanding rehearsal, and then a night out, and it kept me looking fresh-faced the entire time.

The Dream Bouncy Blush does go on very sheer, but the color is buildable for a more dramatic look if you so choose.  To the left is a swatch on the back of my hand (taken in yellow lighting).  The bottom left side of the swatch is what it looks like after two layers are applied, and the upper right side is just one layer.

This blush also comes in a wide range of colors suitable for many different skin tones.  There are light pinks for the fair skinned, peaches for those with yellow undertones, deep pinks for the darker cool-toned skin types, and even reds and browns for the deepest skin colors.  All of the colors are lovely, and the right shade will give you a beautiful, natural, youthful flush.

The Dream Bouncy blush is available at most drugstores in the U.S. (CVS, Walgreens, Rite Aid, etc.), and also at some select specialty stores such as Ulta.   It retails for about $7.99, which in my opinion, is a steal when you look at the price of some comparable products.  For more information and to see all of the available shades, go to www.maybelline.com.

Maybelline is quickly becoming my favorite and my go-to when it comes to drugstore cosmetics.  After trying out the Dream Bouncy Blush, I can definitely say that it is going to become a daily part of my makeup routine.  I will, without a doubt, be purchasing this again!

Have you tried the Dream Bouncy Blush?  Which shade looks best on you?  Let me know in the comments!

Thursday, January 19, 2012

Face of the Day: Winter Classic

Hey, all!

I ended up pretty happy this morning with the way my makeup turned out, so I thought I'd share.  I did a very simple, wearable look that will enhance your features without making you look too made-up.  The shades I used are really nice for winter;  The sparkly shadow will give your eyes an icy, snowy look, and the deep pinkish-red lip gloss will make your lips really stand out. Sorry that the photo quality isn't the best, but you should be able to get the general idea!

Eyes

  • Shadow:  Urban Decay's Naked Palette.  Sidecar all over the lid, Smog on the outer corners, Naked on the brow bone, and Virgin under the brows and on inner corners.
  • Brows:  ELF's Eyebrow Lifter and Filler in Medium
  • Mascara:  Covergirl LashBlast Fusion
  • Eyeliner:  Maybelline Eye Studio Lasting Drama Gel Eyeliner on both upper lash line and waterline.
Lips
  • NYC New York Color Liquid Lipshine in 580 Rivington Rose (I LOVE this stuff!  It's my new go-to lip gloss.)
Face
  • Tarte Cheek Stain in Flawless on the apples of the cheeks
Hair
  • Showered at night, threw my hair up in a tight bun, went to bed, and woke up with some nice waves.  :)
That's all there is to it!  Let me know if you guys try this makeup combination.  I'd love to see how it works on some different complexions!

Sunday, January 15, 2012

Look: Golden Gradient with the Naked Palette

I'm still having a total blast playing around with my Naked Palette, and today I'm back with a look that I created the other day.  This is a pretty, subtle look which creates an ombre effect that will make your eyes look bigger and brighter.  It looks natural so it's perfect for everyday wear, and it's extremely easy and quick to do!

Golden Gradient


  1. Prime the eyelid with an eyeshadow primer, liquid foundation, or concealer.
  2. With a flat/c-shaped eyeshadow brush, apply Smog to the outer half of the lid.
  3. With the same brush, apply Half-Baked to the inner half of the lid.
  4. With the same brush, apply Darkhorse lightly to the outer corner of the lid.
  5. With the same brush, apply Virgin to the inner corner of the lid.
  6. With a domed/fluffy eyeshadow brush, apply Naked to the brow bone.
  7. With the same brush in step 6, apply Virgin just under the eyebrow.
  8. Starting about 2/3 of the way in on your eyelid, thinly line your upper lash line with a black liner, thickening the line just slightly at the outer corner of the lid (I used Maybelline Eye Studio® Lasting Drama™ Gel Eyeliner).
  9. With the same liner (or a pencil, if you prefer), line your waterline.
  10. Apply mascara (I used Covergirl's Lashblast Fusion), and you're finished!
That's all there is to it!  Since this is such a natural look, you can pair this eye with a slightly more colorful lip.  I've found that it looks beautiful with my NYC New York Color Liquid Lipshine in Rivington Rose, which is a medium pink shade.

Feel free to share how this look works for you in the comments!  

Wednesday, January 11, 2012

Review: Maybelline Eye Studio® Lasting Drama™ Gel Eyeliner


OVERALL RATING:  9.5/10

PROS: Glides on smoothly, incredible pigmentation, extremely easy to apply, waterproof, doesn't smudge, very nice packaging, can be used on waterline, lasts all day.

CONS: The included brush isn't great for eyeliner; I tossed it.


After squeezing every last drop out of my Revlon Colorstay Liquid Liner Pen recently, I decided that it was about time to move on to a new liner.  I wasn't sure that I wanted to get the Revlon pen again--It did its job just fine, but it usually required a few coats for a deep color and my shaky hands made application a little difficult.  I started asking around about different liquid liners to try, and even purchased a different brand (which was a TOTAL flop, review to come), but I wasn't seeing or hearing of anything that looked like it would work well for me.  I was lamenting about my search for the perfect liquid liner to my fellow cast member on the way home from rehearsal one night, and after detailing how liquid liner tends to frustrate me so much, she offered a simple piece of advice:  "You should try a gel liner."

I had only heard about gel liners before, and had never actually tried one.  They looked intimidating to me--when I was so used to pens, crayons, and brushes, how the heck was I supposed to know what to do with a little pot of liner?  However, at this point, I was running out of time to decide, so I chose to go for it.  I did a quick Google search for "drugstore gel eyeliners," found one from Maybelline, and went out and bought it.

Best. Decision. Ever.

A quick note about gel liners for those of you who are new to them like I was:  They're different than what you're used to, but that's actually a great thing.  The liner comes packaged in a tiny little pot, and you use a brush to apply it.  You just dip the tip of your brush into the pot, wipe any excess off on the sides, and use the brush to apply the liner.  The brush that is included with this product is useable, but definitely not the best option.  I would recommend the Small Angled Brush from the ELF Studio Collection, or something very similar to it.  Also, don't expect to get a ton of product.  The pots that these come in are tiny, but since you use just a teeny bit of product on each application, it should last you a long time.

Maybelline has really stepped up their product quality recently, and the Lasting Drama™ Gel Eyeliner is no exception.  The liner is creamy and amazingly smooth, and SO easy to apply.  I was worried about how I would handle a brush since my hand is so shaky with a liquid pen, but I actually found it much easier to use.  Using the brush makes it so you can hold it close to the bristles, reducing shake and allowing for a clean application.

My absolute favorite thing about this product is the pigmentation.  One sweep across the lash line delivers all the color I need, whereas I used to have to go over my liner several times before it was intense enough for my taste.  Be warned, though;  The black is VERY black.  If you, unlike me, don't like a dramatic black look, I'd recommend going for this same eyeliner in one of their other, more subtle shades, like brown.

The packaging on this product is the best I've ever seen on a Maybelline product.  I wasn't happy at all with the packaging on the Color Plush Silk Eyeshadow, but the packaging for the gel liner is enough to make up for it in my book.  The liner comes in a small glass pot with a sturdy plastic lid, which makes me feel confident that I won't have to run out and get a replacement due to a packaging malfunction.  It looks pretty classy, too;  It fits right in looks-wise with some of my high-end makeup.

I've been wearing this liner every day for about a week now, and I'm extremely impressed with its lasting power.  The liner is waterproof (confirmed after a weepy spell), and won't smudge unless you touch it (even then, it's hard to smudge).  It's even perfect for use on the waterline.  This is the only liner I have ever used that stayed on my waterline ALL DAY.  I wake up, put it on, go to classes, take a nap, go to rehearsal, come home late at night, and after all that, it is still exactly where I put it when I did my makeup in the morning.


Needless to say, I've been converted.  I don't know if I'll ever go back to liquid liner now that I've found gel!  I wouldn't worry about going out and buying some of the other (very) expensive gel liners out there.  I can't think of anything that this liner doesn't do that those could!  The only reason this product didn't get a 10/10 is because of the silly little brush that could be redesigned to be much more efficient.  The liner itself is definitely a 10!

Maybelline Eye Studio® Lasting Drama™ Gel Eyeliner is available at most drugstores in the U.S. (Walgreens, CVS, Rite Aid, etc.), and retails for about $7.  The liner comes in Blackest Black, Brown, Eggplant (medium purple), and Charcoal (medium gray).  For more information, visit www.maybelline.com.

Bravo, Maybelline!  I will be buying the Eye Studio® Lasting Drama™ Gel Eyeliner from here on out.

Sunday, January 8, 2012

Look: Subtle, Pretty "Green With Envy" Eye

The other day, I did a review on the Maybelline Eye Studio® Color Plush™ Silk Eyeshadow, and as promised, I'm back with a look I created with one of the shadow quads!  This look uses the "Green With Envy" quad, and is a subtle and pretty look.  This is a super quick and easy look, great for mornings when you don't feel like putting much effort in or want something you can do in under five minutes.  All of the colors were used dry here;  if the colors aren't intense enough for your tastes, just wet your brush a bit and you'll get all the pigmentation you need!


Subtle,  Pretty "Green With Envy" Eye


  1. Prime the eyelid with an eyeshadow primer, liquid foundation, or concealer.
  2. **I skipped this step in the above photos, but if you'd like a slightly more dramatic look, take the darkest shade in the quad and apply it along the upper lash line, slightly thicker than you would apply eyeliner.**
  3. With a flat/c-shaped eyeshadow brush, take the bright green (second from the right) color and pat it on to the outer half of the lid, bringing the color just a tiny bit past time middle of the lid.
  4. With the same type of brush used in step three, take the darker golden (second from the left) color and pat it onto the inner half of the lid.  In the middle of the lid, where the two colors meet, blend the gold over/into the green in an outward sweeping motion.
  5. Using a small precision brush, take the bright green color and apply it on the outer half of the lower lash line.
  6. Using the same brush in step 5, take the deeper golden color and apply it to the inner half of the lower lash line, blending in the middle where it meets the green.
  7. Using a flat/c-shaped OR domed/fluffy eyeshadow brush, apply the lightest color in the quad to the brow bone and the inner corners of the eyes.
  8. Line the upper lash line with a liquid liner (I used the Revlon Colorstay Liquid Liner Pen in Black), and the waterline with a pencil/crayon liner (I used the Revlon Colorstay Crayon in Black).
  9. Apply mascara (I used Covergirl Lash Blast Fusion), and you're done!

I hope you guys like this look as much as I do!  Leave a comment to let me know how it works for you!

Thursday, January 5, 2012

Review: Maybelline Eye Studio® Color Plush™ Silk Eyeshadow


OVERALL RATING:  9/10

PROS:  Fantastic pigmentation, great color selection, well-coordinated colors, silky-soft shadows, great shimmer, easy to blend

CONS:  Poor packaging quality


Having green eyes means that there are a few certain color palettes that can really make your eyes pop, with shades of purple being one of the best selections.  I always try to keep some purple shadow in my makeup case for days when I want to really play up my eye color.  When I ran out of my last purple eyeshadow from L'oreal (which I really wasn't crazy about), I headed over to the drugstore to pick up some more.  I usually do well with Maybelline products, so I looked over their selection, and picked up their Eye Studio® Color Plush™ Silk Eyeshadow in Virtually Violet (formerly known as "Purple Icon") on a whim.  When I tried it the next day, I was blown away.  I immediately went out and bought two more colors that same evening.

I had never used a drugstore-brand product that I was actually THRILLED about until I found this eyeshadow.  When I dipped my brush into the pan for the first time, I was shocked at how much shadow was immediately picked up--I didn't have to scrape and struggle to get it onto my brush!  When I swept the color onto my lids, I was even more excited.  The colors are so pigmented that they appear on my lids EXACTLY the same as they look in the pans.  The colors smooth on like butter.  The shadow is so soft, and glides effortlessly over the eyelid.  Blending them is a breeze--you can use the shadows to create a beautiful ombre effect on your lids.  I would go so far as to compare these shadows to the shadows from my Urban Decay Naked Palette;  Yeah, they're that good.

The Eye Studio® Color Plush™ Silk Eyeshadow comes in a total of 12 different color combinations, each coordinated for a beautiful look with a variety of shades.  I personally own Virtually Violet, Green With Envy (which I happen to be wearing right now), and Mad for Mauve, and I definitely want to get more.  The shadows come in quads, and can easily be blended together or worn separately for a wide variety of looks.

All of the shadows in this collection are shimmery, so if you prefer matte shades, you probably want to look for something else.  The shimmer is certainly not overwhelming, but is definitely noticeable, and draws attention to your eyes.  

Here are some swatches from the sets I own.  Note that all of these were applied dry;  when wet, the colors become even more intense! 

Virtually Violet

Green With Envy

Mad for Mauve
The lightest shade in this set happens to be extremely close to my skin color.  It shows up much better than this on darker skin!
The bottom line is that these shadows are fantastic.  Before I got the Naked Palette for Christmas, these were the shadows I wore every day, and now I alternate between the two.  The major difference in quality between these shadows and the Naked Palette is found in the packaging.  The Eye Studio® Color Plush™ Silk Eyeshadow packaging is made of really cheap plastic.  I have to handle it pretty gingerly because I feel it might crack or break apart at any second.  Really, though, this is a minor detail for such an awesome product.  I adore these shadows, and I HIGHLY recommend them for anyone who wants high-end quality on a drugstore budget.

These shadow sets retail for between $7 and $10, and you can find them at virtually any drugstore in the U.S. that sells makeup.  Visit Maybelline's website for more information or to buy!

I will definitely be posting looks/tutorials for the shadows I own in the near future, so stay tuned!  For any of you that own other colors of the Eye Studio® Color Plush™ Silk Eyeshadow, feel free to share your experiences or photos in the comments!